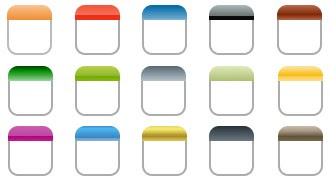
A calendar icon adds little beauty to a blog when used as post date header. You can see one here on this blog or might have seen on several other blogs around the web. And if you don't have it and wish to have a good looking one on your blog then grab it here for today I'm sharing fifteen (15) awesome calendar icons with you all to choose the best that suits your blog.

DOWNLOAD (cal_icons.zip)
Now, most of you must be wondering what to do with the icon only, so here goes the installation steps and codes to see this in action on your blog;
- Step 01:
Go to Blogger > Layout > Edit HTML > (click on) Download Full Template and save a backup of your template.
- Step 02:
(Check) Expand Widget Templates, find ]]></b:skin> and now paste the following CSS codes just above it;
Code:
* Post Date Header Calendar Icon
-----------------------------------------------
*/
.calendar {
height: 50px;
width: 45px;
background: url(Calendar Icon Image Url Here) no-repeat;
font: normal 22px Arial;
color: #9C9284;
text-align: center;
margin: 0 4px 4px 0;
padding: 0 2px 0 0;
line-height: 100%;
float: left;
}
.calendar span {
height: 18px;
display: block;
font: normal 11px Arial;
color: #ffffff;
text-align: center;
padding-top: 0;
}
and replace the texts in RED with the Url of Calendar Icon that you have chosen as per your blog's look and uploaded (to the image hosting site you use), and you can also play with the texts in Blue in the above code to change the colour of the texts that will appear with in the calendar icon.
- Step 03:
Now find <h3 class='post-title entry-title'> and paste following codes just before it;
Code:
<div class='calendar'>
<script type='text/javascript'>
var timestamp = "<data:post.timestamp/>";
if (timestamp != '') {
var timesplit = timestamp.split(",");
var date_yyyy = timesplit[2];
var timesplit = timesplit[1].split(" ");
var date_dd = timesplit[2];
var date_mmm = timesplit[1].substring(0, 3);
}
</script>
<span><script type='text/javascript'>document.write(date_mmm);</script></span>
<script type='text/javascript'>document.write(date_dd);</script>
</div>
and save the template.
- Step 04:
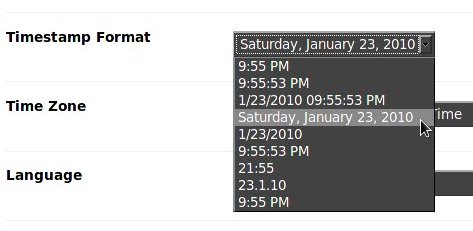
This is the most important step, move to (Blogger) > Settings > Formatting and scroll down to the Timestamp Format options and choose the format just as shown in the image below;

Screen-shot: Timestamp Format
Now, save your settings, check preview of your blog and enjoy a new look of your blog with a sweet smile on your face.
For any further help do leave a comment !
For any further help do leave a comment !


 I'm Googy a Blogger from Bhagalpur, India who is a web & blog addict. I write this blog named Around The Web, in which I share my designed templates, blogger widgets, tips-tricks & add-ons with others & all around the web...

6
thanks
How do I do to show the year
Jun
23
2010
Thanks,
not working ---undefined undefined
Its not working :\
This thing doesn't work! Maybe some corrections are required.
it works..thanks